Friday, October 19, 2012

Baking - My Intangible Sanctuary


“A bad review is like baking a cake with all the best ingredients and having someone sit on it.” – Danielle Steel


Baking for me is an expression of love. People find many ways to express themselves for instance some write, some paint, some debate and some act. But how do I express myself?
Anger, confusion and weariness totally evaporates when I enter the realm of baking. Baking is like a heaven for me. It completely relaxes my mind and takes me to another world which is full of food fantasy. The whiff of tempting, caramelized strawberries shining on the uneven surface of the freshly baked strawberry tart.
I started baking during my summer vacations few years back. Beat butter and sugar, stir in the flour and eggs pour it into a mould, pop it in the oven and Ta-Da!
The smell of freshly baked golden brown cake wafting over me domed and cracked on top mouth watering. The moment I open that oven door is a moment of complete bliss for a baker.

Baking is my intangible sanctuary, kitchen a place where I pour out my feelings that even one of my closest friends won’t understand because no one’s crazy about baking as much as I am.
My confusion and fear ends up with as a chocolate marble cake come out of the oven, the swirly patterns inside when you actually cut the cake describes how much effort I’ve put in.
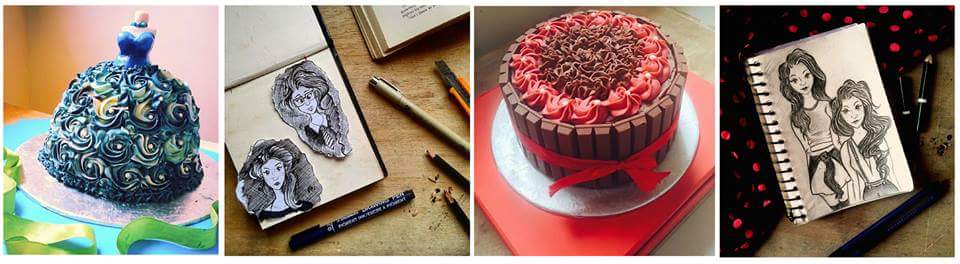
The circular cake iced with vanilla buttercream, chocolate ganache dripping slowly down the sides decorated with such intricate design it just reflects your creativity.
Some of you must be thinking that I am exaggerating but trust me this is how it is and what baking means to me.
The final product reflects the efforts that you’ve actually put into it. The aftertaste is what lingers, contentment and happiness replacing all your stress, fear and anxiety.
For me baking takes care of everything.

“No one is born a great cook, one learns by doing.” – Julia Child

Monday, October 15, 2012

Thick and Chewy Chocolate Chip Cookies

Hey Everyone,
Chocolate Chip Cookies are everyone's favourite. No one can say no to thick and chewy Chocolate Chip Cookies  :)
But lets face it all the cookies are thick and chewy when hot out from the oven but when it cools its becomes crisp. The question arises that how do we maintain that thick and chewy texture?
After trying a couple of recipes I discovered the secret for delicious, thick and chewy cookies.


Use melted butter not just softened butter.


Extra fat, which we get from an extra yolk.
  
Cooking time, which is less than you’d think. 
Ingredients:
Butter  melted (170 g)
Dark Brown Sugar  1 cup
Castor Sugar  1/2 cup
Egg  1
Egg Yolk  1
Vanilla Extract  2 tsp
Chocolate Chunks  1 cup
Flour  2 cups+2 tbsp   
Baking Soda  1/2 tsp 

Method: 
Preheat the oven to 165 degrees.
Line two cookie trays with parchment paper. 
Whisk the flour,baking soda and salt together in a medium bowl, set aside.
Melt the butter either on a stove-top or microwave it.
Transfer the melted butter in the mixing bowl and mix the butter and sugars either by hand or with an electric beater until thoroughly blended.
Beat in the egg, yolk and vanilla essence until combined.
Add the dry ingredients while beating a low speed keeps it from flying out of the bowl.
Stir in the chocolate chunks.
Cover the bowl with a cling film and chill the dough in the refrigerator for atleast an hour before continuing.
Scoop the dough onto the lined cookie tray, leaving plenty of room for spreading.
Bake for 15 to 17 minutes or until the edges are lightly golden brown.
Pull the cookies from the oven while they are still slightly underbaked and let them set for 10 minutes on the hot baking sheet. The cookies will finish baking as they sit. Doing this ensures moist, chewy cookies.
After the cookies are cooled you can store it in an air-tight container. 


Enjoy :)
      

Thursday, August 30, 2012

Chicken Patties

So, on my last post I promised that I'll post recipes which use puff pastry so I made these Chicken Patties in the month of Ramadan for iftar because honestly speaking I was completely sick of having fried items every frikin day. So I decided to try something different.
And the chicken patties came out perfect.
And you know what every time I try something new it always turns out to be more than what I expected.
Seriously I mean it when I try the same thing for the second or third time I always get something wrong.

After seeing that my chicken patties were such a hit. I decided to make it for my cousins who were coming over to my place for iftar. And on that very particular day something went wrong with my oven while my Chicken Patties were still in the oven not baked to perfection. The puff pastry I made didn't have that nice and crisp layers, and was a bit undercooked.

But my cousins they praised me for making it. Anyways back to where we were - The Chicken Patties yeah.
So enough said here's the recipe:


Did I tell you I take photographs of my food from every frinkin angle :)
Well that's me :)


Ingredients:

For the Chicken Filling:
Boiled Chicken   2 cups shredded
Milk                  1 cup
Salt                  as required
Black Pepper      2 and a 1/2 tbsp or as required
Oil                    2 tbsp
Flour                 2 tbsp
Onion                1 medium chopped
Egg

Method:
In a fry pan pour some oil and in it saute the chopped onion for a minute or two or until its soft and transparent. Then put in the flour and stir for a few seconds then add in the chicken along with the seasoning then add in the milk and let it cook until it get really thick in consistency. 
Take it out in a bowl and let it cool.

In the meanwhile roll the puff pastry lightly with the thickness of 1/8 cm. And cut it out with a round cutter. And put int on a lined baking tray. Grease the edges with egg and place a spoonful of the chicken filling in the centre. Cover the top with another piece of pastry cut in the same shape. Press the edges until its firmly sealed. Give it an egg wash (greasing the entire thing with egg to give it a nice shine)
Bake it in a preheated oven at 200 degree centigrade for 25-30 minutes or until its raised and brown in colour.

After 25-30 minutes ta-da your treat is ready!
Enjoy :)

Don't forget to give in your feedback....

Thursday, August 23, 2012

Puff Pastry

Hello to everyone who's reading my blog now :)

Well six weeks down one more week till my college starts again.

This summer vacations I baked alot and tried alot of new things, new recipes will be posted soon.

And recently I watched Julie and Julia I just loved every bit of that movie because I am also a foodie who loves to cook/bake. 
The funniest part was when Julie was cooking crabs, I just couldn't stop laughing :).

Anyways I recently wanted to make chicken paties but for that you have to make the puff pastry, which is quite difficult but it all comes with practice.
A nicely made puff pastry is a delight in the French cuisine. Its buttery, flaky, rich and very light with many layers.
The idea of making the puff pastry is to create many layers of the dough and the butter to be folded and turned within the dough.

Be sure that you do this work in a cool place and the area where you are making the dough should not be cluttered.

If you want an evenly layered pastry then you have be keep this in mind to roll the dough with the same thickness every time you fold it and again I will say it comes with practice.

The ingredients are as follows:
Flour  1/2 kg
Salt    1 tsp
Oil     2 tbsp
Water (for Kneeding)
Masterpuff or unipuff  (200 gm)

And for those who don't know what's masterpuff/unipuff its a kind of substitute for butter which is used in the layers while folding and it does not melt, so it makes your job much easier.
For the residents of Karachi you'll find this in Empress Market, and for the people who live abroad you can find it by the name of Crisco (all vegetable shortening).


Method:

Sift the flour into a mound in a big bowl and make a well in the centre. Add the salt, water and oil to the well.
Mix with four fingers until the salt dissolves.
Use your hand or an electric beater with dough attachment to pull the flour into the well and mix until blended, adding rhe remaining water if the pastry is dry. 
Work the pastry into a sticky ball.
Wrap it in lightly floured baking parchment or tea towel, then refrigerate for about 30 minutes.

I did this in easy way cut small pieces of masterpuff and after 30 minutes of refrigeration of the dough take it out and roll it into a rectangular shape with straight edges, then spread the small pieces of masterpuff which you made earlier in the center.
The picture below will help you:


Fold the bottom third of the rectangle up toward the centre, carefully aligning the edges. Brush off any flour.
Fold the top third down to make a neat square and brush off any flour.
You will have a neat square of pastry with the fold on the bottom.
Keep it for rest for atleast ten minutes. 
Roll out the pastry into a long rectangle. Again fold into thirds. Gently press 2 fingertips into the pastry to indicate that 2 turns have been completed.
Wrap the pastry and let it rest for another 10 minutes.
Give the pastry 2 more turns in the same method. Then mark it with 4 fingerprints to indicate a total of 4 turns have been completed. 

Then wrap and refrigerate it for 10 minutes more before rolling out for shaping and baking.

And that's how you make the Puff pastry it might be a little time consuming but you make make variety of things with it.
And making it at home is all worth it.

Will make your family happy.

Hoping you liked the recipe don't forget to give in your feedbacks. :)


Wednesday, July 11, 2012

Eclairs

Hey Everyone,

I made eclairs like a week ago and my family totally loved them especially my sister she ate most of my bite-sized eclairs.

Eclairs are the ultimate thing to make. I first had eclairs in a wedding the small bite-sized ones. When I saw them on the platter the eclairs looked like they were hard but the moment I popped it in my mouth it felt like I have been put into Food Heaven I mean it literally.

Bursting the flavours of bittersweet chocolate and perfectly balanced with the sweetness of the cream filling.

Ahhh and the choux pastry was amazing they are just so soft, light weighted and melted in my mouth.

Then I decided why not make these at home it can't be that difficult.
So I got the recipe and I was good to go.
Eclairs may look very difficult and complicated to make but honestly you will make them easily even if your not a pro.


Eclairs consist of three main parts first comes the choux pastry which consists of (eggs, butter, water, flour). The second is the cream filling and third is the chocolate ganache topping.

They are absolutely divine and are perfect to impress your guests and make any meal special and definitely worth a try.

The ingredients are as follows:
FOR THE CHOUX PASTRY:
Butter 100 g
Water 1 cup
Salt     1/4 tsp
All-purpose flour  1 cup
Eggs   4

FOR THE FILLING:
Cream  300 ml
Icing Sugar  1 cup sifted
Vanilla Essence 1 tbsp

FOR THE CHOCOLATE GANACHE:
Dark chocolate  60 g
Butter 2 tbsp

METHOD:
FOR THE CHOUX PASTRY:
Preheat the oven at 200 degrees. 
In a medium saucepan, melt the butter in the water on the stove. When the butter completely melts let it come to a boil and the add the salt and flour and stir until a sticky ball is formed. Then take it off the heat and beat in the eggs one by one until a smooth thick batter is formed.
Transfer the batter into a piping bag and pipe out 4 inch fingers onto the prepared baking sheet.
And bake for 20-25 minutes or until  its goldens brown and bigger in size. They should be light in weight when you lift it and should have a hollow inside just like the image below.

Take it out of the oven and let it cool.

FOR THE FILLING:
Usually the filling for eclairs is a classic vanilla custard but instead I used whipped cream for the filling.
For the filling make sure your beater attachment, the bowl and the cream itself is really chilled or it won't be whipped properly.
So beat the chilled cream until it forms soft peaks then gradually start adding the sifted icing sugar and vanilla essence until it forms stiff peaks when the beater attachment is raised.

FOR THE CHOCOLATE GANACHE:
For the ganache melt the chocolate and butter together in a double boiler until they form a uniform mixture and has a shiny appearance. Set aside.
Note: Make sure you use really good quality dark chocolate or you won't get the same results.

ASSEMBLING:
Fill the piping bag with the cream filling. And make small hole at the back of the eclairs and insert the pastry bag in the hole and fill it with the filling or you can also split the eclairs vertically in half. Spread the filling between the halves and place the halves together. 
Repeat this method with all the eclairs and at the end drizzle the chocolate ganache on top of the eclairs.

Chill until its ready to serve!


Wednesday, May 30, 2012

Chocolate Chunk Cupcakes with Coffee Buttercream Icing

Hey Everyone,
I haven't been around for quite a long time but since I'm back I have a new recipe to share with you all.
Chocolate Chunk Cupcakes I made these cupcakes especially for my brother on his birthday and he totally loved these.
These cupcakes are really soft,moist and bursting with flavour. The original recipe was with a chocolate icing but I prefer it with the coffee flavoured buttercream because the cake has chocolate chunks already. These cupcakes are really very easy to make and you must give it a try its all worth it in the end.


Ingredients:
Butter                   200g
Castor Sugar        1 and 1/2 cup
Eggs                     3
Vanilla Essence     1 tbsp
Flour                    2 cups
Baking Powder    1 tsp
Chocolate chunks 1 cup
Milk                     6-7 tbsp or more if required

Method:
Preheat oven at 180 degree for 20 to 25 minutes.
Line your cupcake tray with cupcake liners.
Sift the flour and baking powder together in a bowl atleast three times to get a nice soft cake and set aside.
Beat butter and sugar together until it forms a pale,light and fluffy texture.
Add in the eggs one by one beating after each addition.
Add in the vanillla essence.
Now before folding in the dry ingredient put the chocolate chunks in the flour mixture.
And now fold in the dry ingredients in the butter mixture alternating with milk until all the dry ingredients are incorporated.
Spoon the mixture into the cupcake tray lined with cupcake liners and bake in the oven for 20-25 minutes, or until springy to touch and skewer inserted comes out clean.
Once the cupcakes are baked cool them on a wire rack and prepare the icing.

Ingredients for the Coffee Buttercream Icing:
Unsalted Butter  150g
Icing sugar          350g
Milk                   1 tbsp
Instant coffee      1-1/2 tbsp
Hot water           2 tbsp

Method:
Mix the coffee with the hot water until dissolved set aside.
In a large bowl beat the butter until fluffy then slowly and gradually add in half the icing sugar until smooth.
Then add in the coffee mixture and the rest of the icing sugar and milk and beat till its smooth and creamy to ice.

Now ice the icing on your cooled cupcakes.
And your yummy cupcakes are ready to serve!


Thursday, January 12, 2012

Marble Cupcakes

I've baked Marble Cupcakes quite alot. And I must say these cupcake are very easy to make it starts with a basic plain cake batter. Marble Cupcakes are very rich and buttery and the best thing is you get two cakes in one (the white vanilla part and the other chocolate part). When you see the cake from the centre you'll find a beautiful marbling effect. Marble cupcakes make look complicated but trust me its the easiest of all.

Ingredients:
butter 200 g
castor sugar 1& 1/2 cup
eggs 3
vanilla essence 1 tsp
Flour 2 cups
Baking powder 1 tsp
cocoa powder 2 tbspn
milk 1/2 cup
salt a pinch

Method:
Preheat oven at 180 degrees and line the cupcake tray with paper cases.
In a bowl make a paste of cocoa powder along with 11/2 tbsp of milk until incorporated now keep it aside.
Using an electric mixer beat the butter and sugar until light,creamy and fluffy.
Then add the eggs one by one mixing well at each addition.
Sift the flour,baking powder and salt together.
Add the dry ingredients in the butter mixture alternating with the milk.
Now divide the mixture in two bowls
In one bowl of the batter add the cocoa and milk paste that you prepared until its mixed.
Spoon batters into the cupcake tray alternating with vanilla and chocolate batter but be careful don't fill the cupcake cases more then half Give it some space to rise.
To create marbling effect run a wooden skewer through the batters in a swirling motion but don't overmix or you'll lose the marble effect.
Bake in the oven for 15-20 minutes or until springy to touch and skewer inserted into one of the cakes comes out clean.
Set aside to cool on a wire-rack.